Where to Put Fingers on Saxophone: Complete Guide

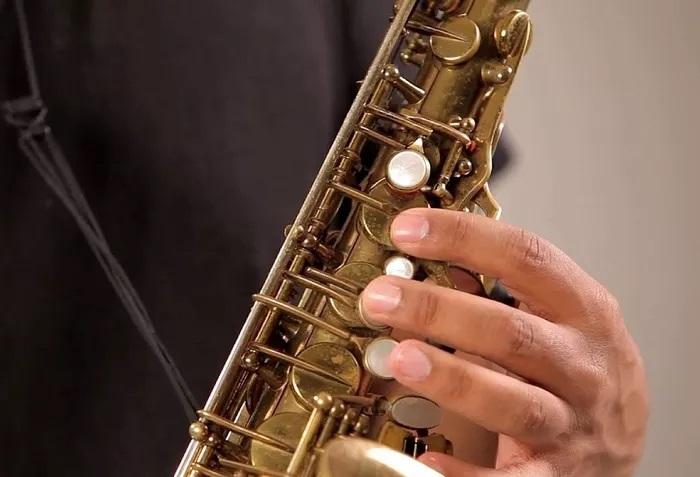
Proper finger placement on the saxophone is one of the most crucial skills for every player, whether beginner or professional. Correct positioning allows for smooth playing, accurate intonation, and reduces the risk of fatigue or injury. In this guide, we will cover every aspect of where to put fingers on a saxophone, from the basic positioning for beginners to advanced techniques for faster passages.
Understanding the Layout of the Saxophone Keys
Before placing your fingers, it’s important to understand the layout of the saxophone keys. A standard saxophone has a series of key groups: the main left-hand keys, right-hand keys, side keys, palm keys, and the pinky keys. Each key is designed to be reachable naturally by a specific finger, ensuring comfort and efficiency while playing.
Left Hand Finger Placement
The left hand is placed on the upper portion of the saxophone. The index finger rests on the first main key, the middle finger on the second, and the ring finger on the third. These keys correspond to the notes B, A, and G in the lower register. The thumb of the left hand supports the saxophone from the thumb rest and is also responsible for pressing the octave key to transition to higher registers.
Left-Hand Index Finger
The index finger covers the first main key, generally producing the note B when pressed. Ensure that the finger is curved slightly to match the shape of the key, providing complete coverage without straining the hand.
Left-Hand Middle Finger
The middle finger rests naturally on the second main key, corresponding to the note A. Keep a relaxed curve in the finger, and avoid pressing too hard as this can create tension and limit finger agility.
Left-Hand Ring Finger
The ring finger covers the third main key, which produces the note G. Proper placement ensures smooth movement when transitioning between the B, A, and G notes.
Left-Hand Thumb
The left thumb is positioned behind the thumb rest and controls the octave key. Mastering the thumb’s role is crucial, as it allows access to higher registers with minimal effort. Keep the thumb relaxed and avoid pressing too forcefully.
Right Hand Finger Placement
The right hand is responsible for the lower set of keys on the saxophone. The index, middle, and ring fingers rest on the three primary keys, covering the notes D, C, and B. These keys form the foundation for playing scales, arpeggios, and melodies.
Right-Hand Index Finger
Rest the index finger on the first key of the lower section, generally producing the note D. Maintain a gentle curve to ensure smooth, fast movement without straining the hand.
Right-Hand Middle Finger
The middle finger rests on the second key, producing C. Keeping the fingers close to the keys allows for rapid transitions between notes and ensures accuracy.
Right-Hand Ring Finger
The ring finger is responsible for the third key, usually producing B. Correct placement helps maintain even pressure and avoids unnecessary tension during extended playing sessions.
Right-Hand Pinky Finger
The right-hand pinky controls several important keys, including low B, C, and the side keys for alternate notes. Proper pinky positioning is vital, as it enables fast passages and chord changes without straining the hand.
Palm Keys and Advanced Finger Techniques
Palm keys, located near the top of the saxophone, allow for access to the higher register notes. They are played by slightly lifting the palm fingers and pressing the keys lightly. Mastery of palm keys requires practice, proper curvature of the fingers, and careful coordination with the left-hand thumb for octave control.
Using the Palm Keys
The first three palm keys are generally played by the index, middle, and ring fingers of the left hand. Ensure your hand is relaxed, and avoid reaching too far, which can cause strain or affect intonation.
Side Keys and Trill Keys
Side keys, also called trill keys, are played with the right-hand index, middle, or ring fingers. They allow the saxophonist to execute fast note changes, ornaments, and trills. Proper side key technique ensures fluidity and precision, making these keys essential for advanced playing.
Pinky Keys and Low Notes
The pinky fingers of both hands are crucial for reaching the lower notes, including B, C, and D. These keys are slightly harder to press, so developing strength and flexibility in the pinky fingers is essential for consistent performance.
Finger Exercises for Saxophone
Practicing specific finger exercises helps build dexterity, strength, and coordination. Examples include:
Scales and arpeggios, played slowly and accurately.
Trill exercises using side keys.
Palm key exercises to improve high register control.
Finger independence exercises to strengthen weaker fingers, especially pinkies.
Tips for Mastering Finger Placement
Consistency is key. Follow these tips to improve your finger technique:
Practice slowly and deliberately, focusing on accuracy.
Use a mirror to monitor hand and finger positions.
Keep fingers close to the keys even when not pressing them.
Gradually increase speed once accuracy is achieved.
Incorporate finger exercises into daily practice routines.
Conclusion
Mastering where to put fingers on a saxophone is essential for every player. Proper finger placement, combined with relaxed hand positioning and dedicated practice, ensures accurate intonation, fluid technique, and long-term comfort. Whether you are a beginner or an advanced musician, consistent attention to finger placement will dramatically improve your playing, allowing you to explore the full expressive range of the saxophone.
- Art
- Causes
- Crafts
- Dance
- Drinks
- Film
- Fitness
- Food
- Juegos
- Gardening
- Health
- Home
- Literature
- Music
- Networking
- Other
- Party
- Religion
- Shopping
- Sports
- Theater
- Wellness


